|
|
Ultimately, I had to drop the sunroof anyway to get to the dents to the left and right of the opening. |
|
|
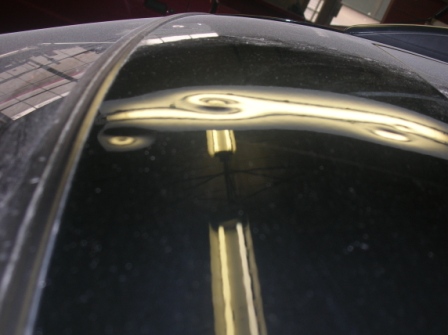
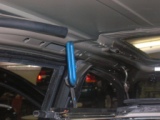
Sunroof Solo
The most valuable trick with sunroofs is how to drop them when you're all by your lonesome.
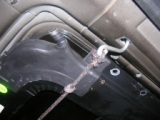
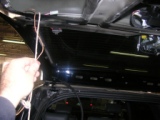
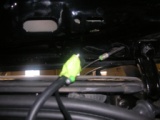
This is what I call the rope ratchet cradle trick. Notice the ratcheting ropes used in the front and back of the sunroof.
These ropes are available at many home and hardware stores. If you can't find them you can substitute any sturdy adjustable strap.
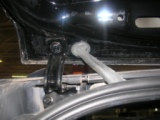
Place the hooks in a hole on the left and right sides of opening. Pull them taut and now you can take off your drain hoses, electrical connections and finally bolts.
Remove the bolts in such a way that the front or back comes down evenly. It should catch and rest on the ropes.
|
|
|
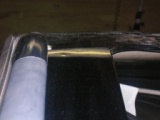
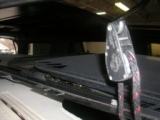
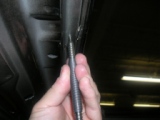
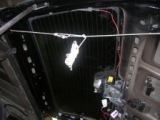
Once you have all the bolts out, you can lower it by loosening the ropes. Try to lower it evenly as possible. Notice the pictures below and how much gap was gained.
Reclining the seats gives you more room to drop even further. |
|
|
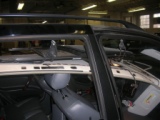
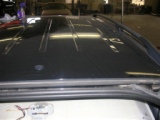
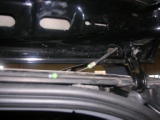
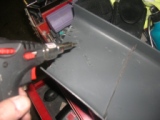
Below you can see how the dents to the sides of sunroof were now easily worked with a whale tail. |
|
|
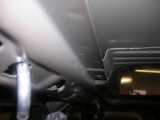
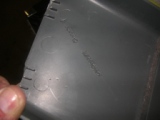
This area presented more challenges though.
Much was open but in the first inch closest to the sunroof opening was double metal with structural glue in between.
A couple of smaller dents blended right out. Do you remember blending? This is the process where I worked the metal around the small dents down to match the level of the dent. Spreading a sudden sharp low into an invisible wave. These were not deep at all or it wouldn't work. I simply started tapping down around the dent being careful to avoid the center.
Spring Punch Dent Removal
There was one dent in this area that looked like it was blending well. But when I got down and looked across it from a 90 degree angle to where I was, it looked awful. This is how the driver would see it so I had to do something.
The spring punch worked well in this case. You can see below where I used it.
Always watch the metal on top in your light as you're doing this. You can see it come up in your light as you pull back on the spring and pop it. Any time you have double metal and no tool can get in between you can use this. You will push the bottom metal into the top layer till the dent is gone.
Not knowing this caused me a lot of humiliation at a shop with 20 techs when I ruined a hood on a Grand Cherokee. Ten of them came up after and said why didn't you try the spring punch?
I hope knowing this makes you a lot of money and saves you from embarrassment. |
|
|
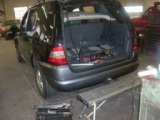
Gaining a new angle
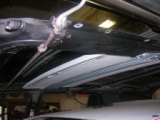
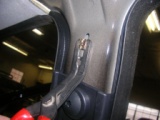
SUV's are a lot easier to do when you remove the hatch.
Not only can you access the dents at the back easier, you can also cross check your work you just completed.
This is why a front to back approach works well on SUV's and vans. |
|
|
Does the thought of taking off the hatch put a lump in your throat? I feel your pain.
No big deal when you know the rope trick. |
|
|
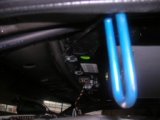
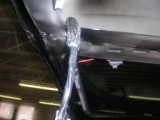
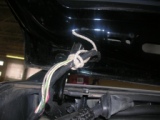
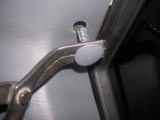
See how the wires run down a closed channel toward the hinge? Once you get the wires disconnected it's easy just to pull them on through.
But wait, how will you get them back where they were?
Ever try pushing a wet noodle? |
|
|
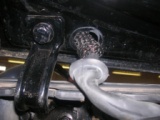
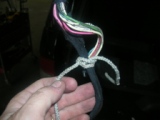
Before you pull the wires through, tie a rope to the end of the last wire. When you pull the wire out it will pull the rope into the channel. Tie it off and leave it in place till you're ready to put the hatch back on.
From there it's just the same thing in reverse. Use the rope to pull the wire back through. |
|
|
What if you get excited and forget? (were you thinking about the money again?)
A body man showed me this trick:
Use an old hood release cable to fish through the channel. Or a bicycle brake cable. When these are still in their sleeves they are stiff yet flexible enough to get you down there. |
|
|
Use tape to temporarily secure the wire or hose to the hood cable. Pull it on through and you're done. |
| |
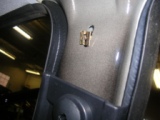
Cracked Up
A broken piece of plastic used to be an automatic call to the parts dealer. Sometimes you can actually weld these pieces back together. Works well if you have a clean break.
Below is a butane soldering iron I carry with me. Running the hot tip back and forth on the back side of the crack "welds" it back together. |
|
|
The clip from hell or Mercedes from Hades
When I first worked on this model in 1998, I broke one of these clips. Back then all we had were the forked type pullers.
The new pliers type from Steck have been a big help. |
|
|
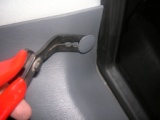
Here is where I really love them: Metal clips that pop off the plastic trim.
Before I used a screwdriver and a bloody finger to get these out. Best $25 ever spent. Look to the bottom of this page for a link to the Steck Website. |
|
|
I enjoyed spending a day with you on this job. I hope you learned a lot. I know I did!
Happy pushing,
Tim Olson
Ps here is the link to Steck's website:
http://www.steckmfg.com/21720.htm |